This recipe favors similarly sized thighs and drumsticks so the frying schedule is manageable at home. Oil temperature and piece size matter more than a promise that one fixed number of minutes fits every chicken.
Buttermilk Fried Chicken
Includes 4–12 hours refrigerated marinating and 15 minutes resting the dredged coating before frying.
Planning totals add preparation, cooking and listed waits. Overlapping stages may shorten the schedule; ingredient and equipment differences can lengthen it.
Ingredients
Times and base yield refer to the original recipe. Scaling quantities does not automatically change pan size, temperature or cooking time.
Step-by-step method
The steps describe the base batch (4 servings). The calculator changes the ingredient list only; amounts written in the steps, equipment and timing remain for that base batch.
Step 1
Coat chicken in buttermilk and half the salt and refrigerate for 4–12 hours.
Step 2
Mix flour, cornstarch, paprika, garlic powder, pepper and remaining salt.
Step 3
Lift chicken from the marinade, let excess drip and press firmly into the seasoned flour.
Step 4
Rest coated pieces on a rack for 15 minutes while heating oil to about 165°C / 329°F.
Step 5
Fry in small batches, turning as needed, until the crust is deep golden and every piece reaches 74°C / 165°F.
Step 6
Drain on a clean rack and rest briefly before serving. If a large piece browns before its center reaches 74°C / 165°F, finish on a rack in a 180°C / 356°F oven and check again; the oven time depends on piece size.
Why this version works
Use the buttermilk rest for adhesion and flavor
The buttermilk coats the surface and contributes tang, but it is not a substitute for cooking to a safe temperature. Keep the chicken refrigerated through the four-to-twelve-hour rest and turn it in the mixture once if parts sit above the liquid. Let excess marinade drip away before dredging. A dripping-wet piece picks up an excessively thick flour layer that can become gummy under the crust. Discard marinade that has contacted raw chicken instead of serving it as a sauce.
Build a coating that stays attached
Mix the flour and cornflour thoroughly with the measured seasonings before any raw chicken enters the bowl. Press the coating around creases, shake away loose excess and rest the coated pieces on a rack for about fifteen minutes. This allows moisture to bind some flour to the surface. Patch bare spots gently rather than repeatedly burying the chicken in more flour. The goal is an irregular but secure coat, not a thick shell that separates from the skin when cut.
Why moderate frying heat is more reliable
At roughly 165°C / 330°F, bone-in chicken has time to heat inside while the crust colors. Adding a batch drops the temperature; watch its recovery instead of turning the burner fully up immediately. Too many pieces create a long cool interval and encourage a greasy coating. Keep a little space between them so tongs can turn each safely. A heavy pot buffers temperature changes, but no pot removes the need to observe the thermometer.
Check the meat, especially near the bone
Probe the thickest flesh without touching bone and confirm at least 74°C / 165°F. A dark crust and clear-looking juices do not prove this. If a large piece is browned before its center is ready, transfer it to a rack in a moderate oven and finish gently rather than burning the coating in hotter oil. Compare pieces individually: a small drumstick and a large thigh may not finish together. Keep raw-chicken tools away from the finished rack.
Let the crust release steam
Drain on a metal rack rather than laying several pieces flat in a pile. The underside needs airflow so escaping steam does not condense against the coating. Rest briefly before eating because both meat and trapped juices are extremely hot. If serving several batches, hold ready pieces on a rack in a warm oven for only the necessary interval and monitor safe holding temperature. Prepare the salad and table before frying; the crust is at its best when it is not waiting for side dishes.
Organize batches by piece size rather than packet order
Separate similar-sized thighs and drumsticks before coating. A batch containing one very large piece and several small ones has no single reliable removal moment, even when all crusts look equally golden. Keep the clean draining rack distinct from the rack that held raw coated chicken. If the first batch needs an oven finish, plan clean oven space before lowering the next raw pieces into oil. The complete meal schedule includes recovery between batches, so prepare sides that can wait rather than holding safely cooked chicken in a tight steamy pile.
Ingredient choices and substitutions
Choose similarly sized thighs and drumsticks for more even cooking. Use a heavy pot with ample headroom and a thermometer. Refined neutral oil should be fresh and suitable for frying.
Fixes for this recipe
| What you notice | Likely reason | What to do |
|---|---|---|
| The coating comes off in one sheet | Excess wet marinade, loose flour or handling before the first side set. | Drain the marinade more carefully, press on an even coating and allow the dredged rest. Turn with tongs that support the piece rather than scrape its surface. |
| The outside burns before the center cooks | Oil is too hot for the size of the bone-in piece. | Finish the browned chicken on an oven rack and verify 74°C / 165°F. For the next batch lower the frying temperature and use more evenly sized pieces. |
| The crust feels oily and heavy | Crowding caused a prolonged oil-temperature drop, or the coating was too thick. | Fry fewer pieces and let the oil recover between batches. Drain on a rack and avoid covering the hot chicken tightly. |
Recipe-specific questions
Can I replace buttermilk with plain yogurt?
Plain unsweetened yogurt thinned with a little milk is a practical variation, but its thickness and acidity differ. Aim for a coating that clings lightly rather than forms a thick paste. Keep the same refrigerated handling and safe final chicken temperature.
Can I reuse the dredging flour?
Flour that has contacted raw chicken is contaminated and should not return to the pantry or be used for an uncooked preparation. Portion the dry coating in advance if you want to avoid wasting the entire mixture.
Why is the chicken not safe just because it floats?
Floating depends on steam, coating and fat as well as temperature. It cannot verify the center beside the bone. Use the food thermometer on each size of piece rather than treating color or buoyancy as a final safety test.
Serving and storage
A crisp vinegar slaw and simply cooked greens add freshness. Keep a cooling dairy dip separate if offered so the coating stays dry until each bite.
Refrigerate cooked chicken promptly once the meal is finished, using shallow containers. Reheat on a rack until thoroughly hot rather than sealing warm pieces in a covered pan that steams the crust. Reheated coating will differ from fresh frying, even when the chicken is safely reheated.
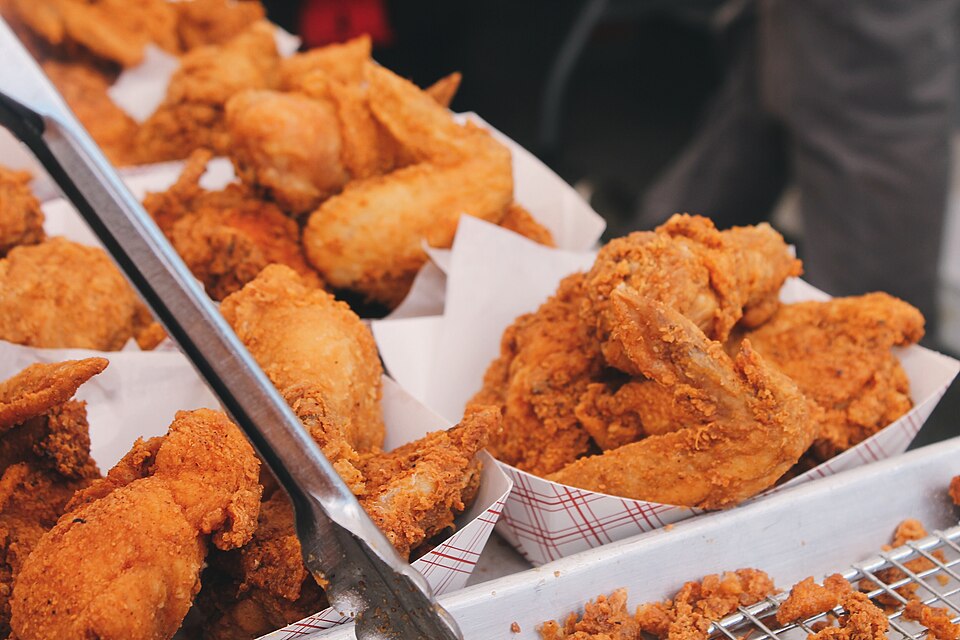
An AI-assisted editorial guide, not independently kitchen-tested. The photograph is a serving example. How we prepare and correct our guides.
For safe handling, consult FDA guidance. Send recipe corrections by email to ZYS10.